Surprisingly, not a lot to say about the dashboard wiring... However, keeping detailed notes and keeping my diagrams up-to-date was essential to keep track of what I'd done... Didn't need to use about 30% of the loom as I didn't go the LS or Smith's route, but I did reuse some other spurs for other things, e.g. accessories and to feed my configuration, e.g. Speedhut Gauges.
Components:
- Loom:
- GD
- Gauges:
- Speedhut
- Components:
- Fog Light Switch: CBS (With integral 'on' warning light)
- Hazard Warning Switch: CBS (Black Illuminated Push Button type)
- Heater Switch (For Fan): Europa Spares (The old-fashioned Bakelite type)
- Heater Valve Controller: CBS (The old-fashioned pull/push Bakelite type)
- Light Switch: Europa Spares (The old-fashioned Bakelite type)
- Starter Button: Pilgrim Motorsports (An awesome Snake embossed button that doubles as an extra ignition warning light)
- Warning Lights: CBS (Chrome LEDs)
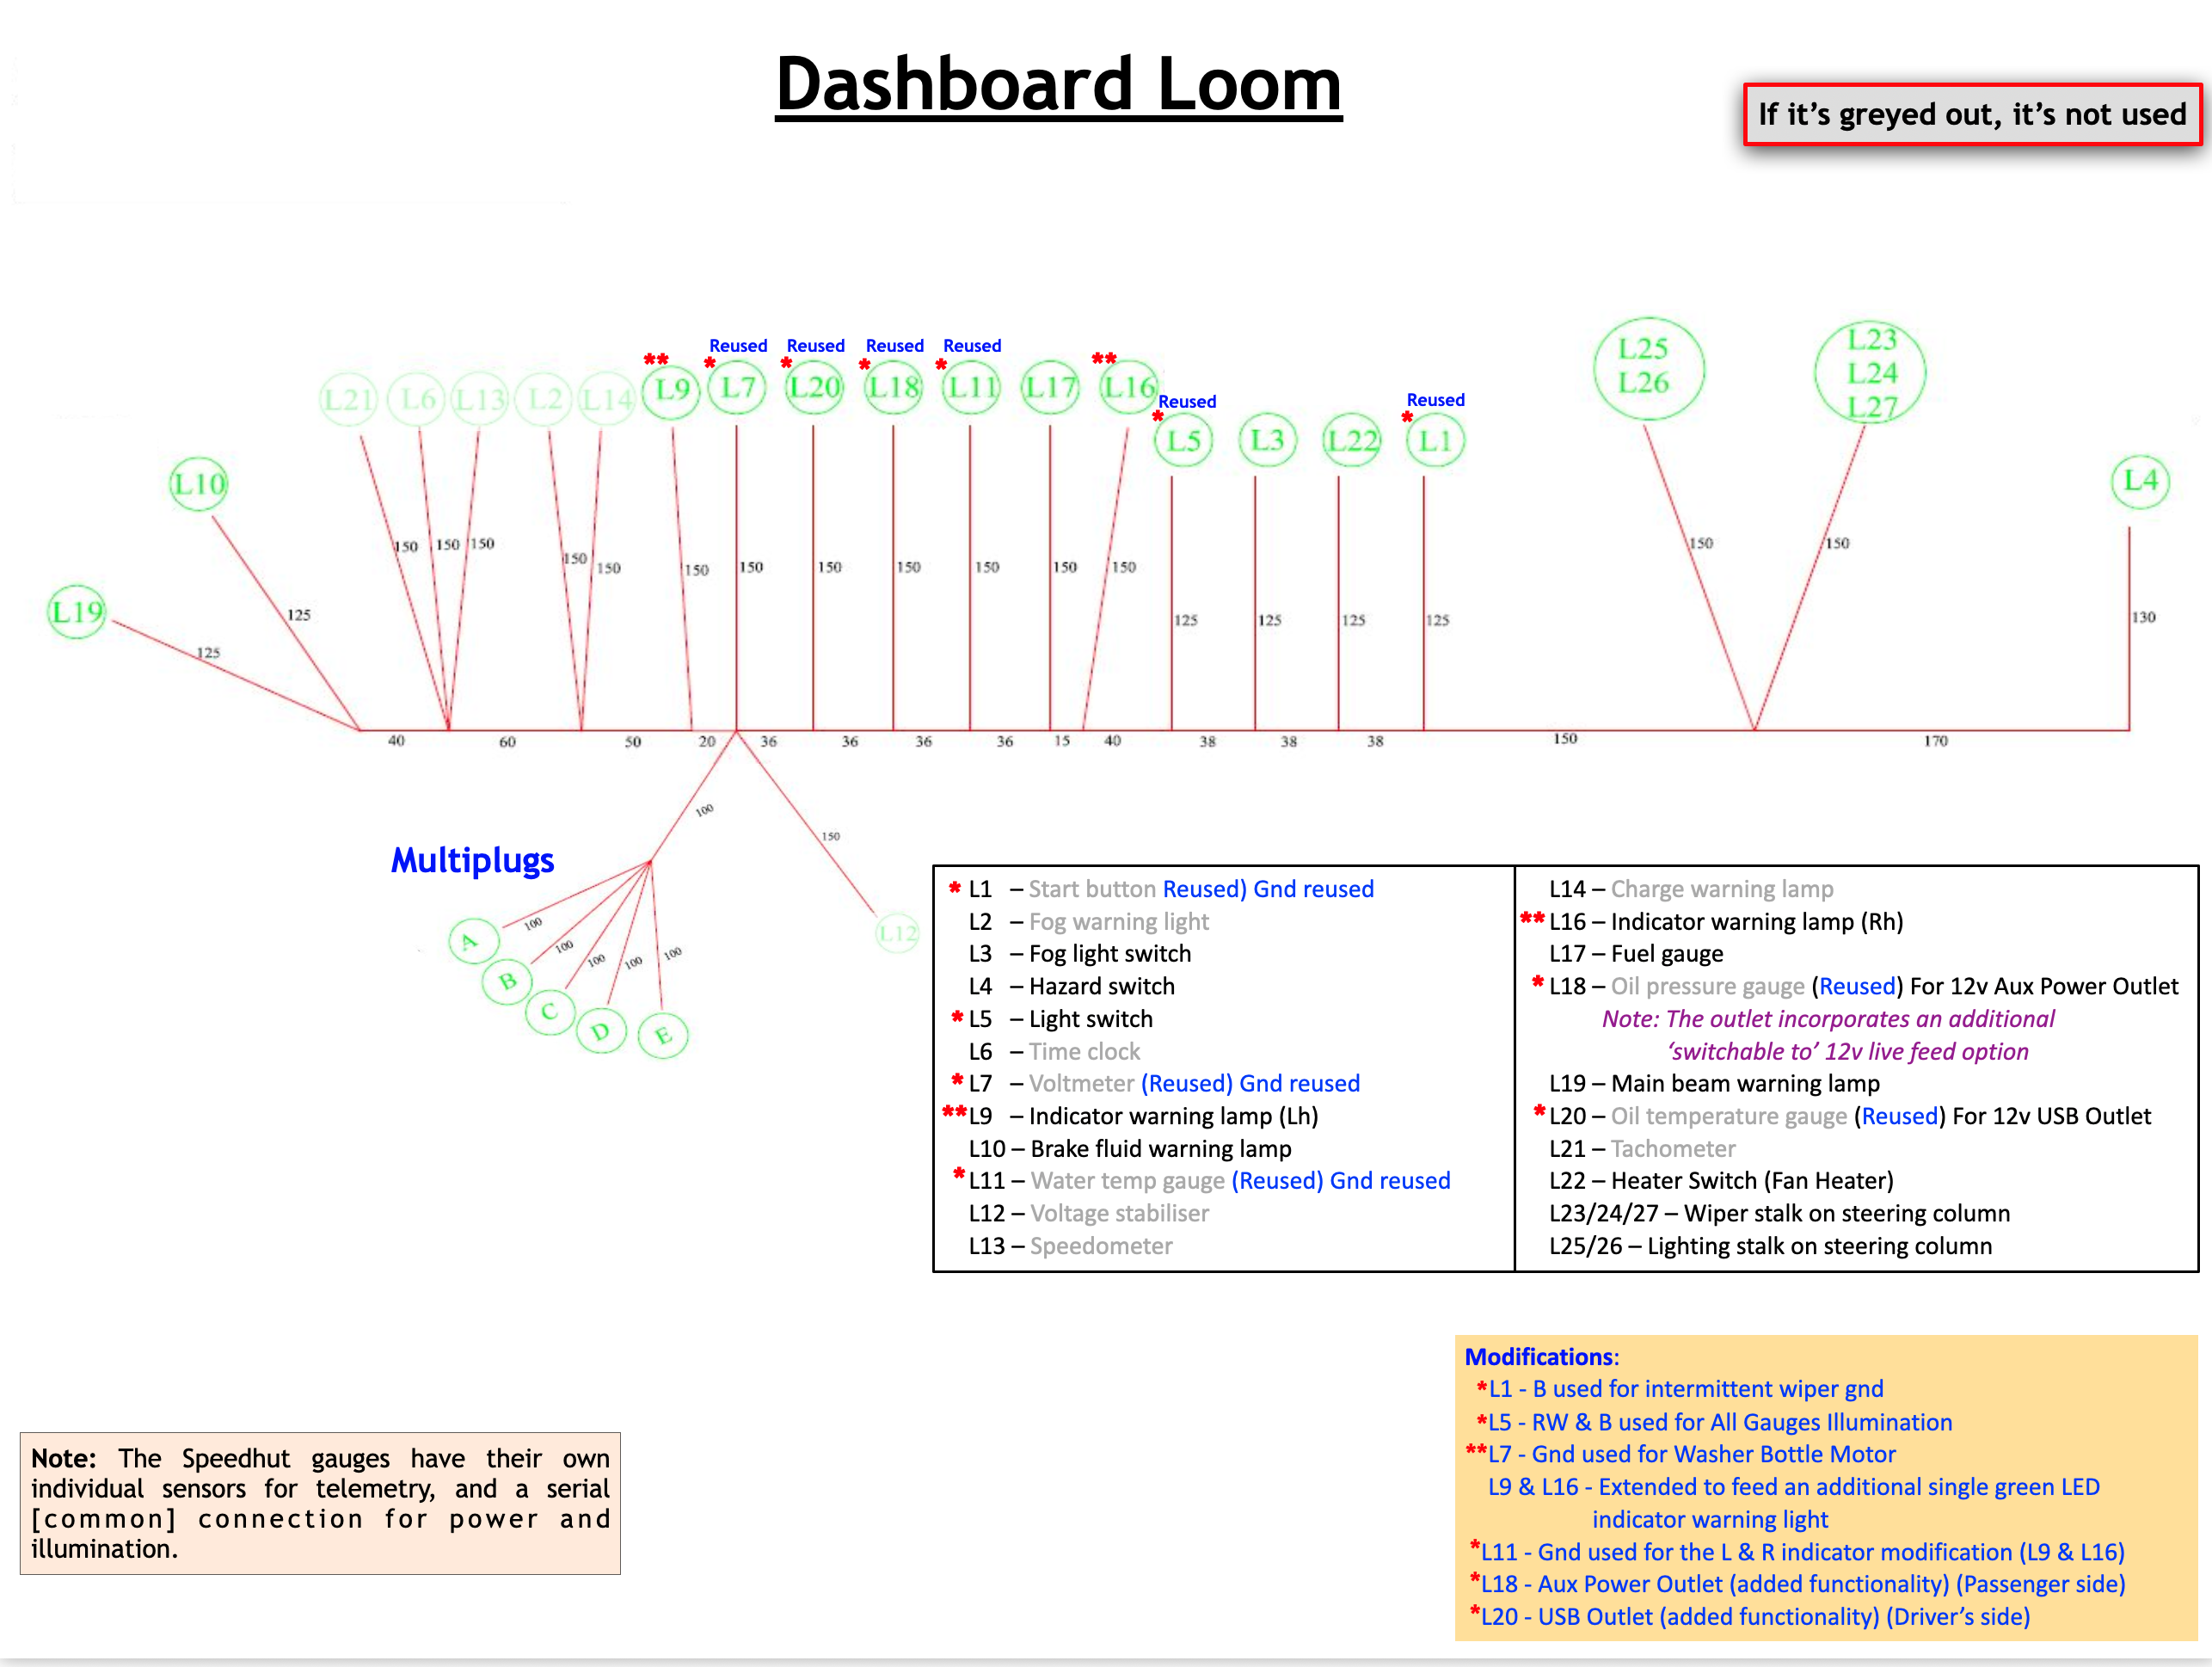
Dashboard Loom


Gauges
The Speedhut gauges are very, very nice... Not too bulky at the back end, and they come with all sensors and plugs, so hooking up was quite straightforward. 0.2 Amps per unit and a single wire hook-up for power, dial and pointer illumination. One thing that was bugging me was how the sensors were electrically connected to the GD loom... Fears were allayed by research... They didn't need to, but this was an option.


The yellow wires are the individual sensor feeds. I'm not going to recreate or unnecessarily complicate things by using the engine loom plug as an interface to the dash' loom because the sensor wires are all factory-made up and ready to plug directly into each sensor.
I also didn't want to have to faff around with my 'real' dashboard blank, as it would have gotten in the way of the wires and things if I needed to fiddle and fix things. What I wanted was for everything to work before I properly assembled it, so I made a plywood mock-up to mount just what I needed to see when the engine was running. Connected everything up to the obvious with the relevant loom spurs and sensors.
Connected up the gauges illumination [serial feed], power and gnd lines to the Illumination and gnd outputs on the dashboard loom spur L5 (Light switch, RW and B terminals). The power for all the gauges is provided from a single 12v keyed ignition wire (red), and there is a [common] gauge brightness knob which I will mount on the underside of the dash' to the right of the driver.